Showing posts with label recipes. Show all posts

Tuesday, March 8, 2016

Bunny Pie #EasterMadeEasy {Recipe & Tutorial}

This shop has been compensated by Collective Bias, Inc. and its advertiser. All opinions are mine alone. #EasterMadeEasy #CollectiveBias

Spring is in the air!

For the first time in years spring has actually sprung early, thank you Jesus! With Easter arriving early this year I am so glad the weather will match the occasion and maybe we won't be wearing coats over our Easter dresses after all. 

Today I wanted to share the perfect delicious & quick Easter dessert with you. It is something that you can whip up in a matter of minutes with the kids and is sure to leave your dinner guests, friends or whomever impressed!


Sometimes I want to make a special treat but I don't always have time to whip up a made from scratch dessert, especially during the busyness of spring. Anyone else in the same boat as me?!


Enter Mrs. Smith's & Edwards Pies.
They are a total game changer.

Recently while shopping at my local Wal-Mart I decided to stock up on a few items to get me through the next couple of months. Walmart has a HUGE variety of Mrs. Smith's & Edwards Pies. I try to keep one in the freezer year round, you never know when you might need dessert in a pinch. Oh the many times that I have been rescued by their convenience. Not to mention all of the times that we pull one out just because it is a Monday.

Right now you can save $1 on any Mrs. Smith or Edwards Pie purchase on Ibotta!
I recently signed up for Ibotta after my friend Anna recommended it and I am already loving it.


This particular shopping trip I had something extra special in mind. With Easter less than 3 weeks away, now is the time to start planning and preparing for all of the celebrations. I picked out my pies, headed home and got to work.


The pie is pretty perfect just the way it comes.
Those delicious layer and a homemade cookie crust make every bite delicious. 

I decided that by adding a few simple ingredients I could turn this pie into something festive.


print recipe

Bunny Pie
A fun festive treat featuring Edwards.
Ingredients
  • 1 Edwards Pie (any flavor)
  • 2 Black Grapes
  • 1 Raspberry
  • 1 piece Pull n' Peel licorice
  • 1-1.5 Cups Whipped Topping
  • 1 Piece of white card stock
  • 1 Piece of pink paper
Instructions
1) Remove the pie from the box and fill in the middle with and even layer of whipped topping.

2) Use the grapes, raspberry and licorice to create the bunnies eyes, nose and whiskers.

3) Cut the card stock and pink paper into bunny ears (gluing together if needed and slide them in between the crust and the pie plate.

4) Enjoy!

Details
Prep time: Cook time: 0 minutes Total time: Yield: 1 Pie


How cute is this pie?!
My girls were GIDDY with excitement

#EasterMadeEasy


Fun and simple to make.
Delicious to eat! 

Mrs. Smith's and Edwards Pies are the perfect dessert any time of the year for any occasion.


What is your favorite kind of pie?
With the huge variety Mrs's Smith's and Edwards make you are sure to find something for everyone!

Now it's your turn to link up for this weeks Tuesday Talk!
Grab the button in my sidebar and join the fun!


post signature


Wednesday, February 24, 2016

Simply The Best Blueberry Muffins {Recipe}

Have I ever mentioned how much I love muffins?!
Probably at least once a week I would assume.

A few weeks back I was talking about muffins *surprise* particularly blueberry muffins. I had tried out a recipe on Pinterest that claimed to be the best blueberry muffins and what I discovered was a big fat disappointment. I guess you have to try a few recipes to discover that what you already have is the best thing. 

So today I am going to go out on a limb and declare my recipe to be the winner.


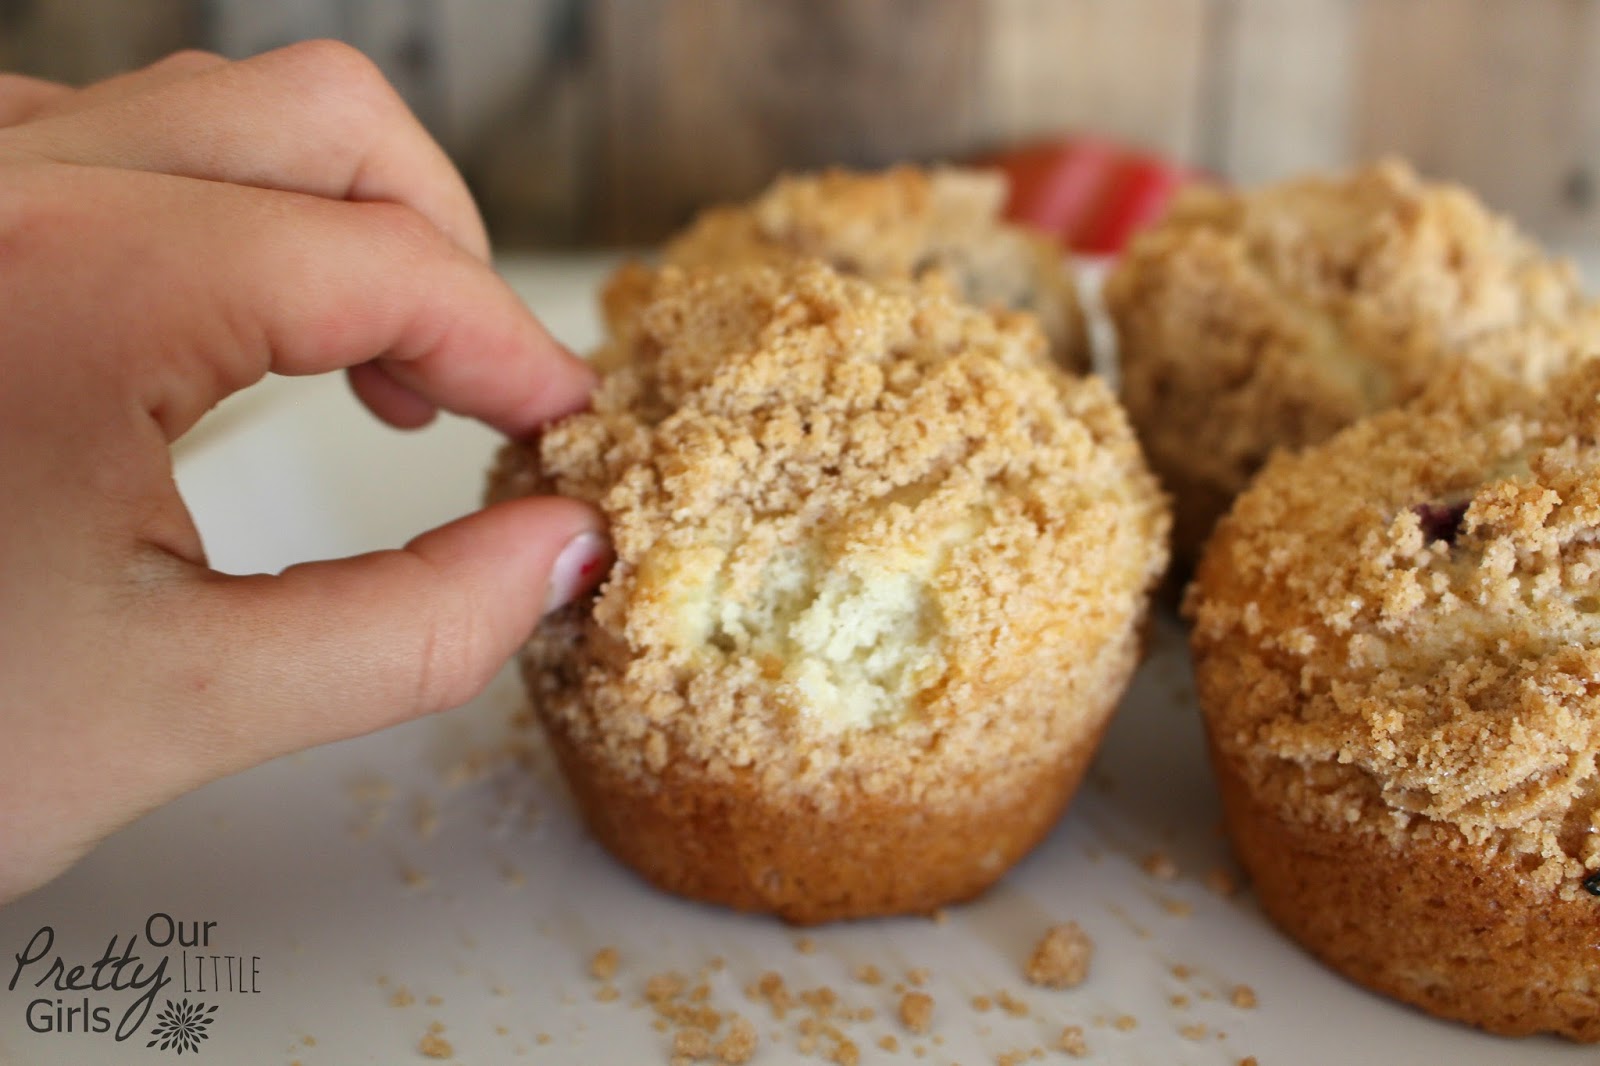
I took parts from a few different recipes that I liked and created these. They are easy to make and the strudel topping is always a favorite in my house. We enjoy them year round too since this recipe works great with both fresh or frozen blueberries. You don't even need to thaw them, just dump them right in there frozen. Easy peasy!


You might even say they are irresistible.
 I was mid "photo shoot" with my muffins and I turned around to discover this. Apparently Emily had found her muffin (the one that doesn't have blueberries in it) and I caught her sneaking a few bites. So I did what any good blogger would do. I told her to do it again and snapped a photo :). Apparently she loves muffins too. 

Enjoy!


print recipe

Simply The Best Blueberry Muffins
My very favorite blueberry muffins with a strudel topping.
Ingredients
  • 1 1/2 Cups Flour
  • 3/4 Cup White Sugar
  • 1/2 tsp Salt
  • 2 tsp Baking Powder
  • 1/3 Cup Vegetable Oil
  • 1 Egg
  • Approx 1/3 Cup Milk
  • 1 Cup Blueberries
  • 2 T Brown Sugar
  • 2 T White Sugar
  • 1/2 tsp Cinnamon
  • 3/4 Cup Flour
  • 1/4 Cup Unsalted Butter
Instructions
1) Preheat oven to 400 degrees. Grease muffin cups.

2) Combine 1 1/2 cups flour, 3/4 cup sugar, salt and baking powder in a mixing bowl.

3) Place the vegetable oil into a 1 cup measuring cup; add the egg and enough milk to fill the cup, totaling 1 cup.

4) Mix this with the flour the batter will be pretty thick.

5) Gently fold in the blueberries fresh or frozen.

6) Fill muffin cups about 3/4 full and top with crumb topping mixture.

7) To make crumb topping mixture mix 2 T brown sugar, 2 T white sugar, 1/2 tsp cinnamon and 3/4 cup flour. Stir n 1/4 cup melted unsalted butter until the mixture is course and crumbly. My favorite way to do this is in the bowl of a stand mixer.

8) Bake for 20-25 minutes or until a toothpick tests clean.

Yield: 1 Dozen


This muffin tin was passed down to me from my mama. It sure looks rough but it has baked COUNTLESS cupcakes and muffins over the years. I wouldn't trade it for anything.


So there you have it, my favorite blueberry muffins.
I hope you love them as much as we do an that they don't disappoint.
If you give them a try be sure to let me know!

What is your favorite kind of muffin?

post signature


Monday, February 22, 2016

Vegan Coconut Shortbread Cookies & Silk Nutchello {Recipe}

This shop has been compensated by Collective Bias, Inc. and its advertiser. All opinions are mine alone. #HelloNutchello #CollectiveBias

One of my favorite parts of the day comes in the afternoon. About 3:00 when we finish school I start thinking of laundry, dinner and the bills that need to be payed, which will most likely be late because I forgot to pay them. Again. But before I let the chaos of our life consume me I try to take a few minutes just for me. 

A few minutes to sit in the quiet, refocus and indulge just a bit. 
The even better part is when the indulgence comes guilt free.

#HelloNutchello


Recently while I was shopping at Walmart I came across Silk Nutchello. Silk Nutchello is a brand new product and comes in 3 delicious nut based flavors: Caramel Almond & Cashews, Dark Chocolate & Walnuts, Toasted Coconut & Cashews. 


They are all under 90 calories a serving an have less than 15 grams of sugar in them. Silk Nutchello is free of dairy, soy, lactose, gluten, casein and carageenan. They are also free of artificial colors & flavors.
No funny business!

How is that for guilt free?


Silk Nutchello can be served many ways, including in cocktails, GENIUS!
But it does taste best poured over ice.


After trying out Nutchello I felt inspired to find other ways I could indulge guilt free.
I've been pretty honest about the feelings I have for cookies, I love them. Having a healthier cookie recipe on hand would be so helpful when the cookie cravings come. I rolled up my sleeves in the kitchen and began creating a treat that wasn't to sweet, had zero refined sugar and it is even vegan!


print recipe

Vegan Coconut Shortbread Cookies
A simple vegan cookie recipe that pairs perfectly with Silk Nutchello
Ingredients
  • 1/2 Cup Coconut Oil
  • 1 1/2 Cups Flour
  • Dash of Salt
  • 1/3 Cup Agave Nectar
  • 1/4 tsp Extract Vanilla, Almond or Lemon
Instructions
1) Cream the coconut oil and the agave nectar together until well mixed.

2) Add in the salt, extract and salt mixing just until the dough forms. The dough should be moist but not sticky. If it is a bit dry you can add a bit more agave nectar. If it is too wet add flour 1/2 T at a time.

3) Roll out the dough on a baking mat until it is 1/2" thick.

4) Using a pizza cutter cut the cookies into 1x3" rectangles.

5) Carefully transfer to a baking sheet and bake at 350 for 13-15 minutes.
*Warning these cookies go from not quite done to done fast. Mine turned out a teensy bit browner than I would have liked them too.

Details
Yield: 1 Dozen Cookies

I'll admit it, I was nervous.
Cookies with no sugar?

The end result turned out perfect. It is kid approved, fast and easy to make and the perfect pairing for my afternoon retreat with my glass of Silk Nutchello


Today I want to challenge you to make a change.

 Instead of reaching for the coffee, soda, tea whatever, try this better for you nut beverage instead. 
Then you too will be left saying things like #HelloNutchello or "It must be 3:00 somewhere?!"


Which flavor of Silk Nutchello would you like to try first?

post signature


Tuesday, January 26, 2016

Peanut Powder Granola Bites {Recipe}, Tuesday Talk V4

This shop has been compensated by Collective Bias, Inc. and its advertiser. All opinions are mine alone. #StartWithJifPowder #CollectiveBias

With the arrival of January and the end of the holiday season I set out to try to regain my focus. I needed to find focus in the gym and focus in the kitchen. I derailed a bit over the holidays and have since made countless confessions that I need to put down the cookies. Hello, my name is Beth and I have a sweet tooth. Buckling down and making better choices in the kitchen is never easy for me. I am always on the look out for something low in fat, high in protein and if it can satisfy my sweet tooth, it gets bonus points. It seemed like a nearly impossible task until I discovered Jif Peanut Powder and created these.


Recently when I was shopping at my local Walmart I stumbled across Jif  Peanut Powder. I am no stranger to peanut powder products and have used other brands in the past. What caught my eye about Jif was the price and even more so the ingredient label. Jif has one ingredient, fresh roasted peanuts. Other competitor brands add salt and/or sugar to theirs. I love how simple and pure Jif is. 


Jif Peanut Powder has the same nourishing protein as traditional peanut butter, but with 85% less fat! 85%, that is amazing! So often I skip out on peanut butter because the fat content but with Jif Peanut Powder I don't have to give up one of my favorite flavors any more. Smoothies, baking, breakfast, dips and more.
This powder can do it all with less calories and sugar. 


Did I fail to mention it also comes in chocolate?
The chocolate contains semi-sweet chocolate and a dash of sugar. It is perfect for those looking to satisfy their sweet tooth, like me! I can't wait to mix some into my Greek yogurt. How amazing would that be?!


I could continue on about how much I love this product. About how it is helping me to meet the goals I set in the kitchen, is a Newman kitchen staple and how good it is but let's talk more about my Peanut Powder Granola Bites.


They are easy to make, easy to grab, a great source of protein and energy and the kids love them!


print recipe
Peanut Powder Granola Bites
A simple no bake granola bite recipe featuring Jif Peanut Powder
Ingredients
  • 3/4 Cup Jif Peanut Powder
  • 1/3 Cup Water
  • 2 Cups Quick Oats
  • 1 Cup Rice Cereal
  • 1/2 tsp Salt
  • 1/4 Cup Honey
  • 1/4 Cup Dates
  • 2 Tablespoons Almond Slivers
  • 2 Tablespoons Mini Chocolate Chips
  • 2 Tablespoons Unsweetened Shredded Coconut
  • As needed Extra Honey
  • As needed Peanut Butter
Instructions
1) Mix the Jif Peanut Powder with the water.

2) Pour the oats, cereal, salt, honey, dates and peanut powder mixture together in a bowl. Stir until combined.

3) Add in the almonds, mini chips and coconut and mix together.

4) Check the mixture for consistency. The dough should be a bit dry and crumbly but it should easily hold it's shape. If needed you can add in more honey, more peanut powder mixture, or peanut butter to get the desired consistency and flavor.

5) Form dough into bite sized portions and roll into balls or flatten a bit into patties.

6) Enjoy as is or drizzle with melted chocolate.

Yield: 2 Dozen


#StartWithJifPowder
When you feel like there is so much you are giving up in the kitchen while trying to make better choices, it is so great to find a delicious & nutritious product like Jif Peanut Powder.

How would you use Jif Peanut Powder?

Now it's your turn to link up for this weeks Tuesday Talk!
Grab the button in my sidebar and join the fun.
Beth at Our Pretty Little Girls | Pinterest | Facebook | Instagram 
 Becky at BYBMG | Pinterest | Facebook | Instagram
Stephanie at Wife Mommy Me | Pinterest | Facebook | Instagram
Christina at Waltzing In Beauty | Pinterest | Instagram
Michelle at Grammie Time | Pinterest | Instagram 


Monday, January 11, 2016

Progresso® Light with Herb & Cheddar Buttermilk Biscuits {Recipe}

This shop has been compensated by Collective Bias, Inc. and its advertiser. All opinions are mine alone #EatLightEatRight #CollectiveBias 

After our first week back to our regular routine I made a few random observations. Like how going back to "normal" can be really hard after all the fun and distractions of the holiday season. I also noticed that winter finally arrived in Missouri and the temperatures this week would agree. It has been cold! You know, that bitter, freeze your nose cold that no other word but a loud "AAaaahhhh" seems to describe?! 

Cold weather always makes me think of two things, snuggling on the couch with my family by a warm fire and soup with biscuits for dinner.


A warm bowl of soup with the family is every bit as good for my heart as it is my stomach. There is just something about sitting around the table and warming up together that I love and find so comforting during these cold winter months.

Recently while the girls and I were shopping at our local Walmart we picked up some Progresso® Light Soup. The cold weather was coming and I am trying to get back into my routine of making smarter choices in the kitchen. I knew having plenty of Progresso® Light on hand would be a great choice, especially on those cold days that are bound to be abundant.


Currently you can save $1.00 when you buy 4 cans of Progresso® Soups!
This offer is live from 1/6/16 through 1/31/16.

The day after we stocked up was the coldest day we have had so far this winter and it snowed! My timing couldn't have been more perfect. When it was time for dinner the only question I had was what kind of soup did we want to eat.

The perfect cold weather meal to eat with my favorite people.


We chose the Chicken Vegetable Rotini and I mixed up the perfect biscuit recipe to go with our soup. These biscuits are flaky and savory with the addition of herbs and cheddar. They are quick to make and easily became a household favorite, even with our pickiest eater. I just told her the herbs were green sprinkles, she loves sprinkles ;).


print recipe
Herb & Cheddar Buttermilk Biscuits
A delicious savory buttermilk biscuit recipe that pairs perfectly with Progresso® Light Soup.
Ingredients
  • 4 Cups All Purpose Flour
  • 4 tsp Baking Powder
  • 1 tsp Sea Salt
  • 1 tsp Baking Soda
  • 2 Sticks (Divided) Unsalted Butter
  • 2 Tbsp Parsley
  • 2 Tbsp Chives
  • 1/2 Cup Shredded Cheddar
  • 1 1/2 Cups Buttermilk
Instructions
1) Preheat the oven to 450 degrees and spray or line your baking trays. 

2) In a large mixing bowl combine the flour, baking power, sea salt and baking soda. Cut in 14 tablespoons of the butter until mixture resemble crumbs. Add the parsley, chives and cheddar in one at a time stirring between each ingredient. 

3) Make a well in the center of the flour mixture, pour in the buttermilk and stir the mixture until large clumps form. Do not over work the dough by letting it form in the bowl. Turn the dough out onto a lightly floured surface and knead by hand gently until the dough comes together.

4) Pat dough out to be approx 1 1/4" thick and cut into 12 biscuits by knife or with a 2" biscuit cutter. Place on baking trays.

5) Melt the remaining 2 Tbs of butter, brush the tops of the biscuits and bake for approx 12-15 minutes or until golden brown.
Details
Prep time: Cook time: Total time: Yield: 1 Dozen


Progresso® come in a large variety of great flavors. You are sure to find something for everyone from traditional choices like Chicken Pot Pie to something exciting like Chicken and Cheese Enchilada.

Progresso
® also participates in the Box Tops for Education program. Box Tops is an amazing program that is a huge blessing to so many teachers and home-school coops like ours. So please cut and save those Box Tops!


What is your favorite kind of soup to warm up with on a cold day?

post signature