I've said it before and I will say it again, I am not a fan of resolutions.
In fact I kind of feel like if you want to be sure that you fail at something, make it a resolution.
I wonder if backwards resolutions would work.
I resolve to eat too many cookies.
I resolve to have a messy house.
I resolve to barely get any sleep.
I highly doubt this approach will be effective but given my past, who knows!
Where it seems the resolution train isn't so popular lately, I do know many of us, including myself, are working on goals.
I love goals!
And what better way to equip you to meet some of your goals than $250 cash?!
*Some new work out gear for the gym.
*Money to fund those date nights.
*Supplies for those projects.
*Extra income in the budget to save, pay off debt or stash for a family trip.
The options are pretty much endless.
Now here is how you can win!
1 | check out all the WONDERFUL women below who brought you this great giveaway! you'll find some new great reads // pinterest boards // instagram accounts // etsy shops...lots of goodies.
So you can imagine the horror, eye rolls, sighs and eye twitches that this drawer in my girls' bathroom was causing me. Seriously, sometimes I couldn't even get the drawer to open.
What started off as a clever idea to put the headbands in the basket morphed into a wicked tangled web of chaos. Because 8 pink headbands isn't enough, obviously. My girls wear A LOT of headbands.
There had to be a way to turn this disaster into something pretty and organized.
And it turns out there is.
The best part is I crafted this simple headband holder in about 20 minutes out of things I already had laying around the house (after raiding my craft cabinet).
To make your own here is what you need!
Pedestal, I used a candle stick holder
Oatmeal container
Rope or ribbon
Burlap to cover
Plenty of hot glue
Carboard
Brown construction paper
The first thing I did was cover the lid. To do this I traced a circle slightly larger than my lid, and glued it on securing the edges with more glue. I already had plans to go around the edge with the rope so I didn't have to be too careful.
Next I went to cover the container. However, I discovered the burlap was a bit sheer and I could still see the oatmeal design. So before covering I wrapped the container with brown construction paper.
Now I was ready! I cut the seam as straight as I could and glued it on calling the seam area the back of my project.
The top excess I shoved in the container and the lid fit snugly and securely on.
To finish the bottom I cut slits and glued them down individually as neatly and tightly as I could.
I added a piece of cardboard to the bottom for added stability and glued the pedestal on.
I found it to be a bit wobblier than I wanted so I wend around the base with the hot glue gun a couple of times trying to create more stability and security. It worked perfectly!
I added some more rope around the bottom and a piece of mustard burlap for decoration.
I later realized that doing this was kind of pointless since you can't really see it but hey, I already had it lying around.
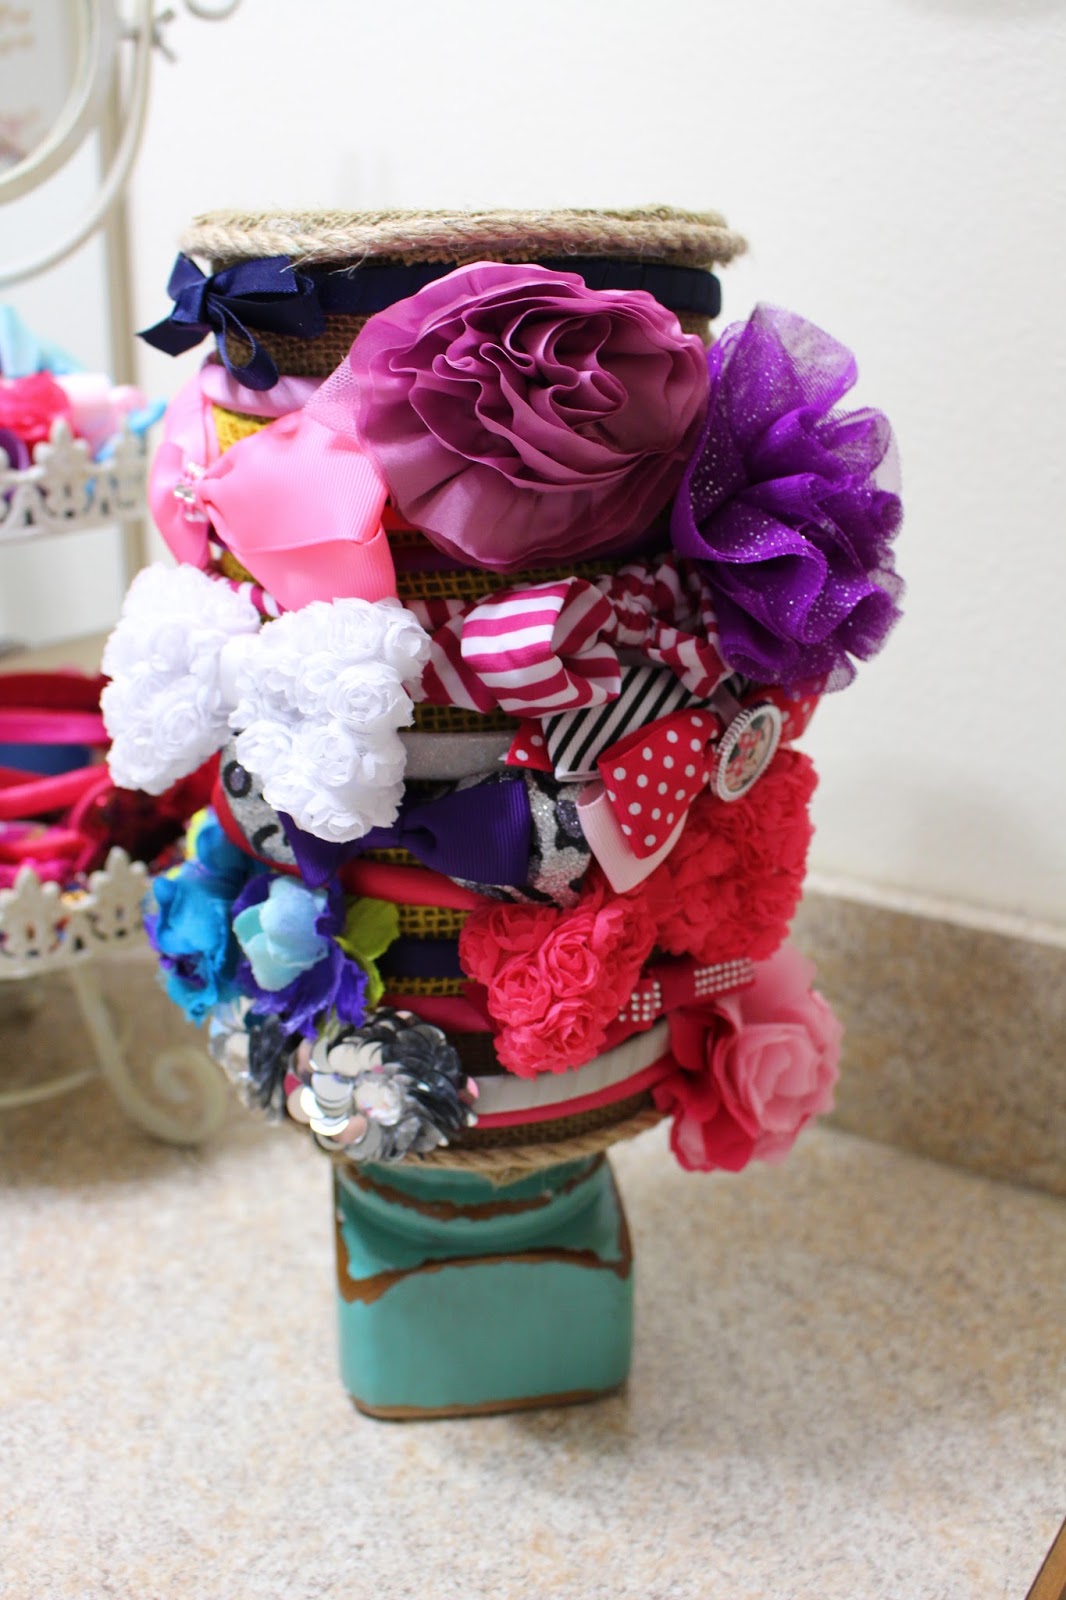
My project was complete.
The finished project holds about 14 -15 headbands.
I definitely think I will be making another one of these in the next year or two.
I also love that the headbands are neatly displayed and easy to find.
No more rummaging through the drawers looking for a certain one.
Projects like this make the organizer in me smile and breathe a huge sigh of relief.
Have you organized anything lately?
Now it's your turn to link up for this weeks Tuesday Talk!
This shop has been compensated by Collective Bias, Inc. and its advertiser. All opinions are mine alone #EatLightEatRight #CollectiveBias
After our first week back to our regular routine I made a few random observations. Like how going back to "normal" can be really hard after all the fun and distractions of the holiday season. I also noticed that winter finally arrived in Missouri and the temperatures this week would agree. It has been cold! You know, that bitter, freeze your nose cold that no other word but a loud "AAaaahhhh" seems to describe?!
Cold weather always makes me think of two things, snuggling on the couch with my family by a warm fire and soup with biscuits for dinner.
A warm bowl of soup with the family is every bit as good for my heart as it is my stomach. There is just something about sitting around the table and warming up together that I love and find so comforting during these cold winter months.
Recently while the girls and I were shopping at our local Walmart we picked up some Progresso® Light Soup. The cold weather was coming and I am trying to get back into my routine of making smarter choices in the kitchen. I knew having plenty of Progresso® Light on hand would be a great choice, especially on those cold days that are bound to be abundant.
Currently you can save $1.00 when you buy 4 cans of Progresso® Soups!
The day after we stocked up was the coldest day we have had so far this winter and it snowed! My timing couldn't have been more perfect. When it was time for dinner the only question I had was what kind of soup did we want to eat.
The perfect cold weather meal to eat with my favorite people.
We chose the Chicken Vegetable Rotini and I mixed up the perfect biscuit recipe to go with our soup. These biscuits are flaky and savory with the addition of herbs and cheddar. They are quick to make and easily became a household favorite, even with our pickiest eater. I just told her the herbs were green sprinkles, she loves sprinkles ;).
print recipe
Herb & Cheddar Buttermilk Biscuits
by Beth January-11-2016
A delicious savory buttermilk biscuit recipe that pairs perfectly with Progresso® Light Soup.
Ingredients
4 Cups All Purpose Flour
4 tsp Baking Powder
1 tsp Sea Salt
1 tsp Baking Soda
2 Sticks (Divided) Unsalted Butter
2 Tbsp Parsley
2 Tbsp Chives
1/2 Cup Shredded Cheddar
1 1/2 Cups Buttermilk
Instructions
1) Preheat the oven to 450 degrees and spray or line your baking trays.
2) In a large mixing bowl combine the flour, baking power, sea salt and baking soda. Cut in 14 tablespoons of the butter until mixture resemble crumbs. Add the parsley, chives and cheddar in one at a time stirring between each ingredient.
3) Make a well in the center of the flour mixture, pour in the buttermilk and stir the mixture until large clumps form. Do not over work the dough by letting it form in the bowl. Turn the dough out onto a lightly floured surface and knead by hand gently until the dough comes together.
4) Pat dough out to be approx 1 1/4" thick and cut into 12 biscuits by knife or with a 2" biscuit cutter. Place on baking trays.
5) Melt the remaining 2 Tbs of butter, brush the tops of the biscuits and bake for approx 12-15 minutes or until golden brown.
Details
Prep time: Cook time: Total time: Yield: 1 Dozen
Progresso® come in a large variety of great flavors. You are sure to find something for everyone from traditional choices like Chicken Pot Pie to something exciting like Chicken and Cheese Enchilada.
Progresso® also participates in the Box Tops for Education program. Box Tops is an amazing program that is a huge blessing to so many teachers and home-school coops like ours. So please cut and save those Box Tops!
I am so happy to be back to my regular Friday routine after a couple of weeks off for the holidays. However I am less than thrilled to be back to the normal school routine that started this week. But some how we survived and with or home school co-op still on winter break we will reward our self with a Friday off school!
So if you've been around lately you may have seen this....
Which morphed into this....
And that really makes me feel a bit like screaming my head off.
But when life gives you lemons you make lemonade right?
I decided to make the best of the situation and take advantage of this chance to update Marissa's room a bit. After all she did pick out the pink the walls when she was 3 years old. We are trying to come up with something girly and fun that she can grow into over the next several years.
As for bedding we have been looking around and nothing stands out above the rest... yet I will be sure keep you updated on our progress.
{FOUR} All The Cookies
So it's not really a diet, but it is getting back on track with better eating habits
For example:
Putting down the cookies
starts
tomorrow.
Really
this
time...
-Me every day this week
Anyone else?
{FIVE}
Recently I was shopping with my favorite clearance rack sifting friend (Anna) and I realized (she sweetly hilariously pointed out) that I have a slight (serious) gray addiction. Gray, black, boring colors. Unless I am hitting up the gym you can pretty much count on a monotone wardrobe from this girl. I may throw in a splash of color but I pretty much accent my gray with some black more than half of the time.
So I vow to TRY to wear and invest in a bit more color this year.
However, just yesterday I decided to keep two black vests from a recent Old Navy order. I only planned to keep one but I had to change my mind because they were "SO" different.
What?! They are!
Fleece vs. quilted and dressy vs. casual. Plus the fleece one was only like $4! How could I not keep it?!
So more color... starting tomorrow.
What is your favorite color to wear?
Friday Linkup Parties
To see where I am linking up check out my link-up tab.